


Getting Started in Astrophotography
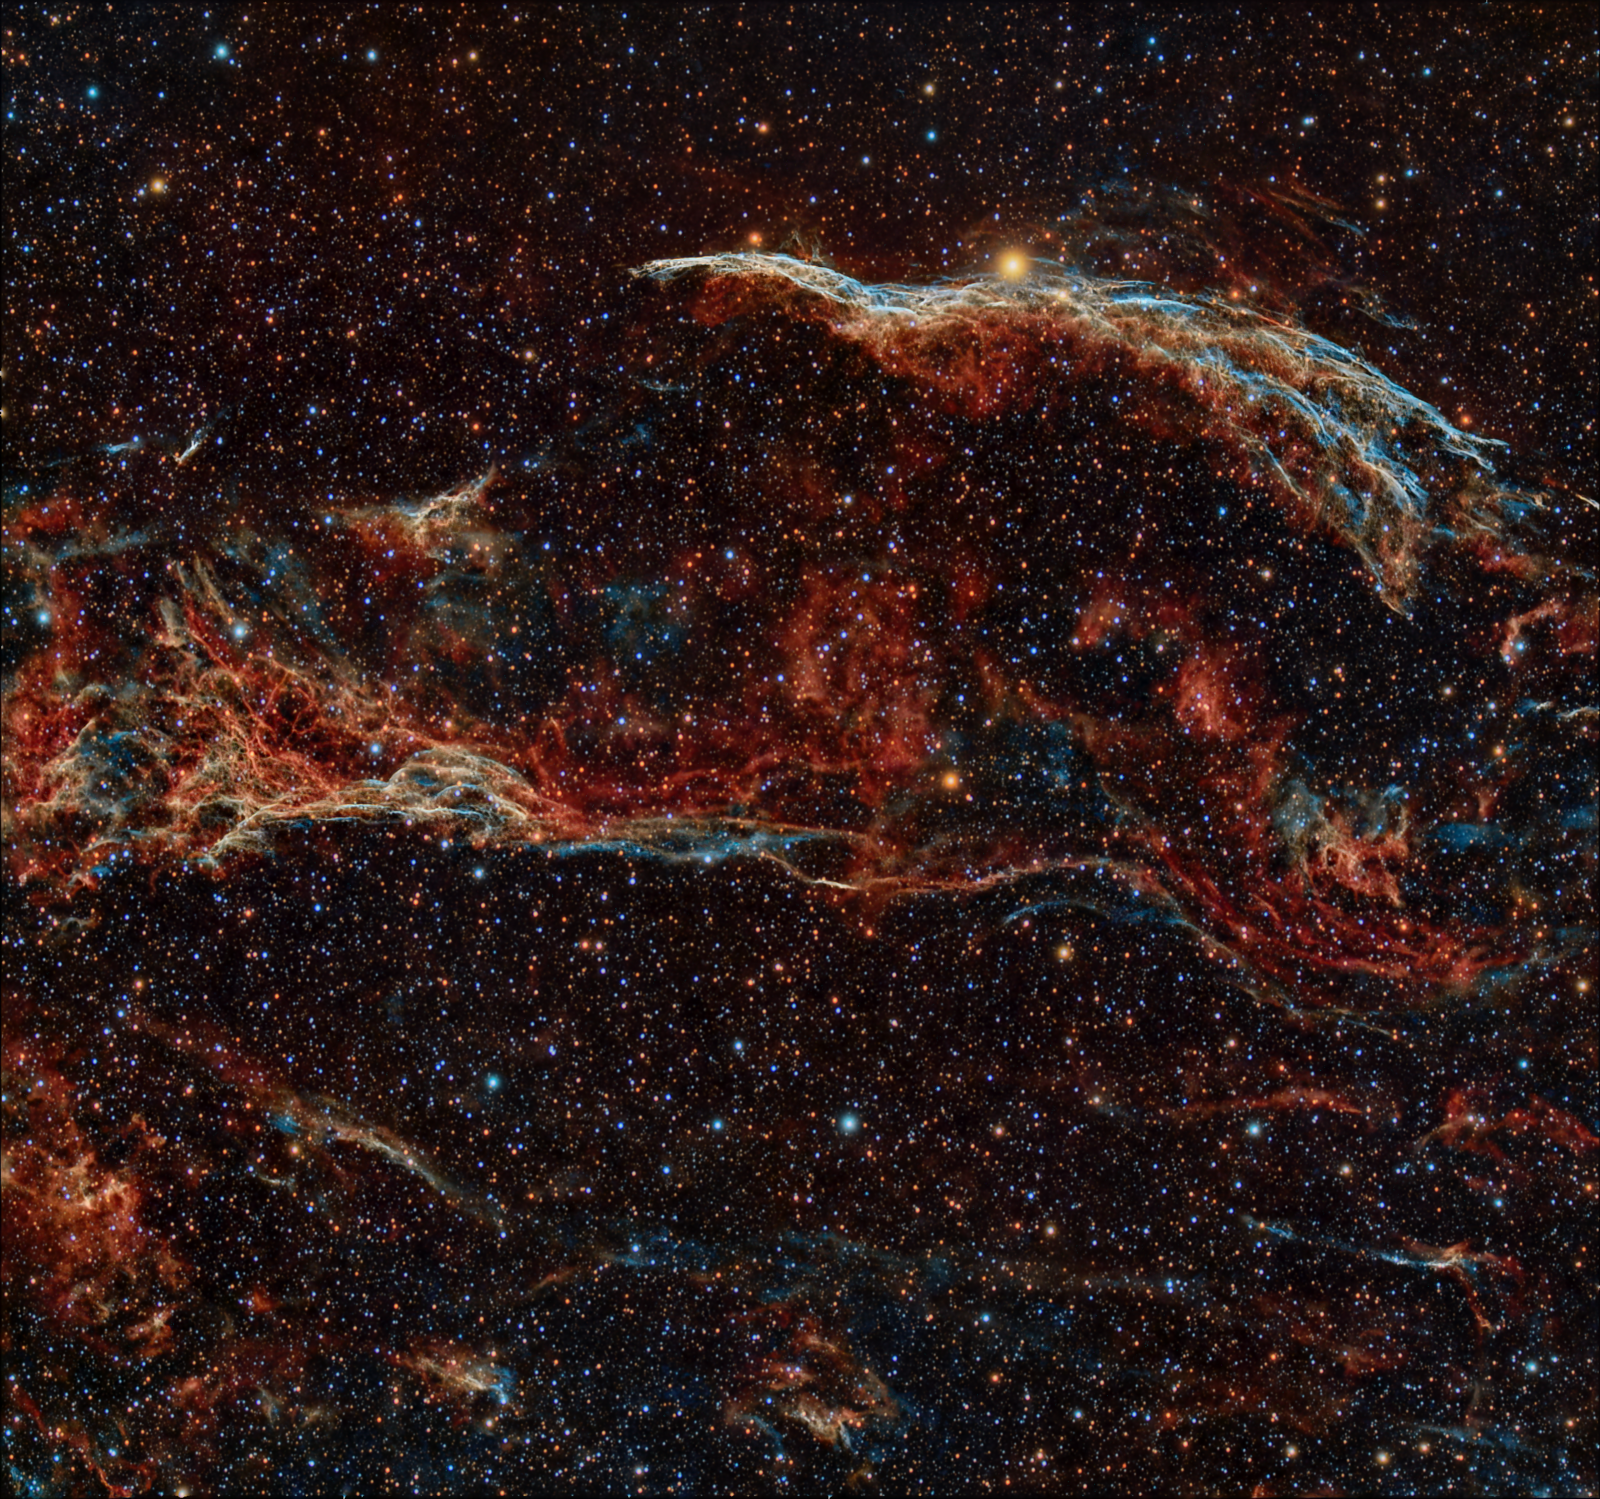
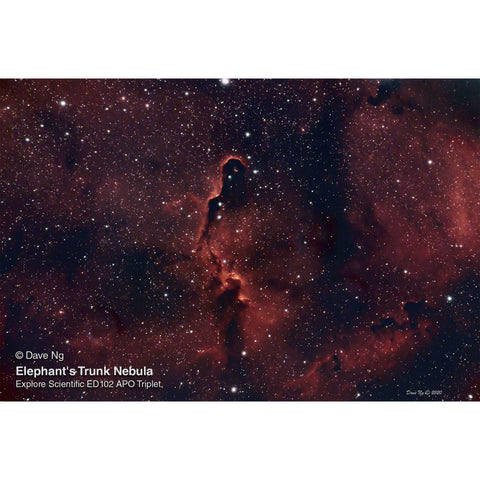
The night sky is filled with stunning celestial treats, and the desire to capture a fragment of that beauty has led many an amateur astronomer to explore the field of astrophotography.
To be honest, imaging the cosmos is an addictive hobby that truly tests one’s patience. Beginners have to curate equipment and figure out how all the pieces work together, learn new lingo like “bias frame” and “stacking” and persevere through a LOT of trial and error all while hoping that Mother Nature delivers good imaging conditions at the right time.
BUT, the first time you successfully capture the wispy tendrils of a faint nebula or the intricate beauty of our Moon’s jagged terrain, you will realize astrophotography is worth all the trouble!

GETTING STARTED
Awe-inspiring astrophotography can be done with just a DSLR camera, a lens, a mount, a tripod and a remote shutter release.
When you are imaging objects in the night sky, maximizing the amount of light that is reaching the camera’s sensor is critical. The automatic settings on a DSLR are not configured to provide the light-capturing ability you are looking for, so you will want to have your DSLR in manual mode. This will allow you to experiment with ISO, focal ratio (also known as f-stop or f-ratio) and exposure length settings.
The desired ISO setting for astrophotography is usually 800 or higher. Higher ISO settings are typically associated with more “noise” in the image, but the increased light sensitivity is necessary for astrophotography and “noise” issues can usually be overcome in the processing stage.
The f-ratio/f-stop controls the diameter of the aperture, which determines the amount of light entering the camera. For astrophotography, faster focal ratios are usually desired so the f-stop in the camera’s setting will usually end in the range of f/2.8 to f/4.
Exposure time determines how long the shutter will stay open, and the desired time will vary depending on the focal length of the lens. A good starting point is between 15 and 30 seconds. The longer that your shutter remains open, the more star trail you will get due to the rotation of the earth. Star trails can make for stunning images themselves and that may be what you are going for in some shots. If you are seeing star trails or blurry stars and that is NOT what you want, shorten your exposure time.

FOCUSING
After you have adjusted the settings on your DSLR, you will need to focus the camera. You can set the manual focus to infinity, but a better option is likely the live view approach. In this situation, you would focus on a bright star like Polaris using the live view. When you have a crisp view of that star, you can point the camera to your actual imaging target. Please note, you will need to refocus throughout the night as temperature changes affect your equipment.
One reason you will notice the effect of temperature changes is because you will be imaging for quite some time to get that ideal shot. A successful astrophotography session will require lots of exposures — an average is 70 to 100 — that you will later “stack” in processing software to combine into one ideal image.
The high number of exposures that are necessary for a successful image means having a remote shutter release is essential. With this device you can trigger the shutter without having to make direct contact with your camera, which minimizes camera shake. You can also use the device to set up a series of exposures, which makes a long night of imaging much less fatiguing because you are not spending hours initiating one exposure after the other. The device is doing that monotonous work for you.

PROCESSING
After you have collected a wealth of exposures, you will need to tackle processing, which is too daunting of a subject to cover here. However, it basically involves getting calibration frames (light, dark, bias, dark flat) and then “stacking” these frames and your raw files to create a final image using processing software like the free Deep Sky Stacker or paid options like PixInsight.
WHEN DOES A TELESCOPE ENTER THE PICTURE
There are lots of amazing astronomical images a simple DSLR and tripod setup can nab. However, adding a telescope to the mix can take your astrophotography to new levels. When a telescope enters the picture, a German equatorial mount or GOTO system should as well.
In piggyback astrophotography, your DSLR will be mounted atop a telescope. In prime focus astrophotography, a DSLR is attached to a telescope using a T-ring and T-adapter. In this situation, the telescope becomes the lens, allowing you to reach deeper and fainter objects.
Both of these types of astrophotography, which will be covered in future articles, require excellent polar alignment and a mount designed for tracking. Additional accessories like field flatteners may also come into play.

TIPS
The number one tip when it comes to astrophotography is to be patient. Imaging nights will be long because of the required number of exposures, and sometimes you will spend days waiting for clear skies. Remembering that trial and error is all part of the process is key.
Being patient is actually more of a rule than a tip, but here are some other helpful tips that will reduce your frustration:
- Find the darkest sky you can. A camera can overcome the debilitating effects of light pollution better than our eyes, but it’s still important to set up in the darkest spot you can find.
- Make sure you have proper polar alignment. How well you can locate and track an object with precision is inherently linked to the polar alignment of your imaging setup. Misalignment only leads to frustration.
- Invest in a German equatorial mount or a GOTO system. These systems make it easier to get proper alignment and track an object.
There is a lot to learn when it comes to astrophotography, but when you look at an image of the cosmos that you captured through hard work and perseverance, you will be thrilled you embarked on the journey.